Bringing good food to light

12.10.2011

Just want to say "Hello!" with a simplest radish salad.

My life used to revolve around books, studying and of course "Kitchen!" till last year. But by the end of 2010, I had to move out of home to be on my own and cut myself from mom's kitchen and my cooking experiments. Although, for two months and a half, during my training in Chennai, I was cooking along with a friend and colleague of mine. But after I got relocated to Bangalore, everything came to a stand still with no chance to cook. :(

That is the main reason why this blog looks deserted most of the times. In some time I'll get back to cooking and I wouldn't wait try out newer recipes which I have learnt from different people and also trying out the recipes from cookbooks which I read when I miss cooking will be on my list. :)

As I've already decided to write something, let me post a simple salad which you can make effortlessly. Radish is something I always disliked. It doesn't seem to taste good when its cooked in a sambar, but, a raw radish sliced finely in a salad has won my heart. This salad was introduced to me during the Chennai days by my friend Shruddha. At first, I was taken aback with raw radish being added. Later, I loved it!. We used to make this whenever it was possible. I totally enjoyed those days. I still remember we used to have a walk in a nearby park with pretty swans around. The phase that I miss the most these days.


Ingredients (For a bowl of Salad)

2 medium sized radish washed, peeled and finely sliced
1 medium sized tomato, finely chopped
1 full cup of fresh coriander leaves, finely chopped
2 green chillies finely chopped
1/2 a lemon's juice
Salt to taste

Mehod

Mix all the ingredients together. Serve with any spicy dish. This is best with biriyani. Or you can just eat it plain.


Happy Cooking :)

Read More

10.16.2011

Chocolate Custard

Hello all lovely people!


Writing a post on "food for joy" had never been this difficult. I have jotted down the recipes that I've tried so far but never wanted to draft them as posts owing to my procrastination. Today I just fought with this disease of postponing things and finally ended up writing!

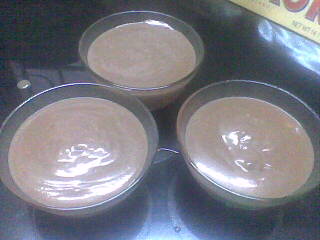
Today's recipe? It is the most chocolaty dessert I've tried. (I am extremely sorry for the poorest pictures I've taken.) I have adapted this recipe from anushruti's food blog. Chocolates is one thing I would be ready to eat at any given point of time. It really helps when you are just worried to the extreme for reasons. Of all the chocolates, it is the bittersweet chocolates that suite my taste buds and I love adding their melted form to ice creams.

Ingredients (For 3 bowls of custard)


50 grams of dark chocolate
1 cup of milk
2 tea spoons of corn flour
50 grams of fresh cream
3/4 cup of sugar

Method


Melt chocolate with a three to four table spoons of milk, as described here.


To the melted chocolate sauce add the sugar and corn flour and stir well. Once its mixed well, just keep it aside.


The chocolate that I had used had nuts in it, thats the white substance that can be seen in the sauce.


Now bring milk to a boil and add the fresh cream to it.


Once the cream + milk mixture has been brought to a boil, add the already prepared chocolate sauce into the mixture. Bring it to a boil.


Once its brought to a boil, take it away from the fire and keep it for cooling.


Transfer the contents to bowls and refrigerate for at least 24 hours.


You can add anything as a topping, example: cut fruits, nuts, cocoa powder. I added some powdered biscuits and crumbled chocolate.

Thanks to divinetaste for this really tasty dessert. Well, everyone can definitely try this one and you must, else you may miss something..

Happy cooking :)


Read More

4.26.2011

Katt Saar


Sorry for not living up to my promise of posting this recipe soon. I'm not having any excuse to explain my laziness in posting recipes ;)

Also my Personal Blog is starving without any posts since a very long time. I've got to get over my detachment from it and soon be posting articles there too. :)

Anyways, coming to today's post (if you've seen my previous posts) is a part of the mini meal post.

Its a simple curry made of dal. Generally in my native language its called Katt Saar or Kattu Saaru. If I'm not mistaken some even call it Thove. The most important part of this kattu saaru is the tempering (seasoning or tadka). The tempering should contain all the ingredients, only then the curry will have a good, delicious and inviting taste.

The usual toor daal that we cook in Indian homes is nothing but pigeon pea . The pigeon peas are dried, their outer coating is removed and they're split. Thats how Toor daal is made.


The preparation goes as follows.

Ingredients (For 5-6 servings)

1 and 1/2 cups of split Pigeon Pea / Toor Daal
2 medium sized red tomatoes
3 thin sized green chillies
Ginger piece of 1 cm thickness and diameter
Coriander leaves (for garnishing)
8 cups of water
Salt to taste (2-3 full tsp)

Seasoning (Tempering)

3 dry red chillies
1 tsp mustard seeds
1/2 tsp cumin seeds
7-8 chopped curry leaves

Method

Boil the toor dal. You can do this in a pressure cooker or in a vessel too.


Chop the tomatoes and slit the green chillies.


Add 2 cups of water to the tomatoes and chillies and bring it to a boil.


Add a piece of chopped ginger to the boiling mixture.

Next you need to add the boiled lentils (dal). Stir gently and remove the lumps if formed.


Bring it to a boil.


Once the mixture comes to a boil add the remaining amount of water. Let it come to a boil and then add salt.


Add the tempering (seasoning) to the saaru.


For the seasoning:


For 2 tbsp of hot ghee/vegetable oil add a teaspoon of mustard seeds. Let the mustard seeds finish popping. Then add a teaspoon of cumin seeds, dried red chilly and curry leaves. Roast it for 15 seconds and add it to the saaru.


Garnish the saaru with coriander leaves. Serve it hot with rice or chapathi.


This is one of my favorites in the list of comfort food.


Happy cooking and take care :)


Read More

3.08.2011

Bhindi Fry (Ladies Finger Fry)


It is said that Okra was one of the favorite vegetables of two most beautiful women in the world, Cleopatra of Egypt and Yang Guifei of China. I wonder whether the name ladies finger got coined from this scenario. :) But undoubtedly it is a vegetable loved by most of us. The aroma it sends out, when it is put into frying, is very much appetizing.

The best out of Okra comes when it is deep fried. It gets tastier when its done with gram flour.

This recipe which I'm going to share now is a tried and tasted recipe from a cookery show of Anjum Anand. I couldn't get the youtube link somehow. But the procedure I've followed is the same as I had watched on her show.

The recipe goes as thus,

Ingredients (For 2 - 3 servings)

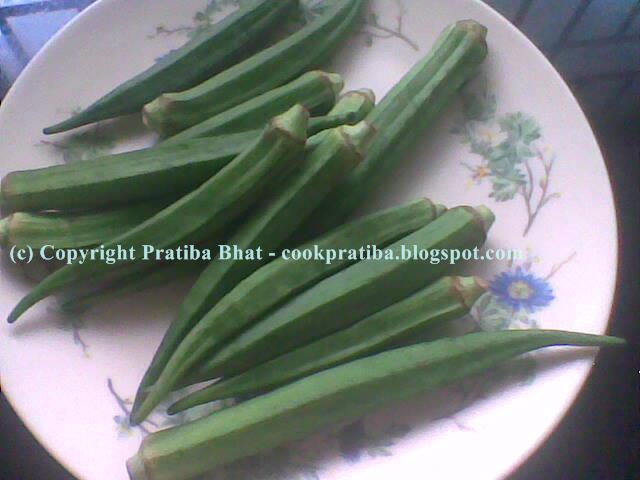
12-13 Ladies finger (Okra)
1 cup gram flour (Besan Powder)
2-3 tsp red chilly powder
Oil for deep frying
Salt to taste (1 tsp)

Method

Wash and chop the Okra.


The chopping should be as shown above.

Add gram flour over the chopped Okra.

Do not add water. The vegetable will release a bit of its water content and hence the gram flour will stick to the Okra.

Bind the two ingredients well.


In the mean time heat oil on a wok.

Add the Okra and gram flour mixture once the oil is heated.


Let the Okra become crispy and reddish brown in color.


Remove the Okra off the oil and drain the excess oil on a tissue.

Sprinkle salt, red chilly powder on the fried Ladies finger.

Mix it well and serve hot. You can make it more spicier by adding chat masala and more chilly powder.


That was one easy recipe. I'm sure this could be tried by anyone. :) 

Do give it a try this weekend.

Take care till I write my next post.

Till then,

Happy Cooking :)


Read More

3.06.2011

A Vegetarian Mini Meal - 2


Greetings to everyone reading this post.


This post is just to add up to the next two posts which will come up in a few hours. A mini meal, where we have two extremely simple varieties. The picture which you can see above is what I'm writing about. The meal comprises of a rasam which is locally named as kattu saaru. Others may have some other names for it, I believe. The other item is made of ladies finger.

I find these small and simple home made items more tastier and healthier than the heavy and bulky stuff we get at restaurants.

Two recipes are to be posted for today. So stay tuned till these posts appear on this blog. :)

Till then, happy cooking :)


Read More

© Food for Joy!, AllRightsReserved.

Designed by ScreenWritersArena